Friday Fermentation Class
A couple of weeks ago, my friend, Maja, texted me saying, "Hey, I'm keen to do a fermentation session with you, do you think we could do that one Friday?" I responded with a resounding, "Yes!"
I love fermentation. And I get excited when my favorite people get into it, too. One of Maja's goals was to choose a project with vegetables that her son would enjoy, and this is the kind of challenge I like to tackle.
My gateway ferments were yogurt, kefir, and sourdough. Vegetables came later. It took a friend of mine telling me about her adventures in making sauerkraut, several months of thinking about doing it myself, and a few false starts of my own before fermented vegetables became a regular part of our life. But I have now been fermenting vegetables for the better part of the last three years and they truly are a part of life for all of us, Wyatt included. He happily eats a variety of fermented vegetables at lunch, dinner, and sometimes both if we don't have much time to cook. He started eating my purple sauerkraut when he was just over two years old, and he seemed to enjoy it from the first bite. But some people, adults and kids alike, tend to avoid the the tangy and sometimes sour flavors that are the signature of fermented foods. As the diet of many Americans has changed over the years, the flavors of fermented vegetables have become unfamiliar. As a result, fermented vegetables may take some getting used to.
In our house, we firmly believe that your tastes can, and do, change over time. I learned to like beets, Wyatt learned to like cantaloupe (he doesn't remember it, though), and one day, Marc may hate parsnips less. Wyatt got the best real life example of the phenomenon of changing tastes in preschool last year. One of his classmates disliked avocados. Disliked as in she really, seriously hated avocados. But according to the custom in the preschool, everyone was required to take a (sometimes very tiny) "no thank you" bite of everything offered at a meal, including the things you don't think you like. Wyatt watched his friend take "no thank you" bites of avocado over their shared preschool career. But one day, his friend took her "no thank you" bite, and much to everyone's surprise, including her own, she actually liked the avocado. She liked it so much that she asked for more, and then even more. This event made a huge impression on Wyatt, and he talked about it for days. After all, it's one thing to be told, "Hey, someday you might really like this food you hate with every molecule of your being," and it's quite another to actually witness when that change happens for your friend.
Keeping in mind Maja's request for an approachable vegetable ferment, I suggested that we start with some fermented radishes and dill carrots. I thought of the radishes thanks to Amanda Feifer's interview on the Local Mouthful podcast. Amanda suggested radishes would be a good first ferment because they're ready to eat in about a week or ten days. I think that in addition to their short fermentation period, radishes are a good first ferment because their flavor changes so much during that week or so. I suggested we also do dill carrots because they're really delicious (imagine the flavor of a cucumber dill pickle combined with the sweetness of a carrot), they take about as much time to ferment as the radishes do, and I was almost out of dill carrots myself.
Maja ordered some fermentation weights and picked up a couple of wide-mouth mason jars. She also got some gorgeous red and orange carrots. I got the radishes and some more carrots, dill, celery seed, and I had the salt, pepper corns and garlic. We were ready to ferment. Here's what we did:
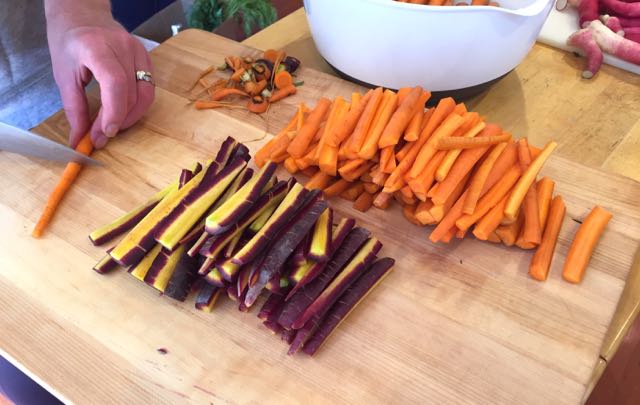
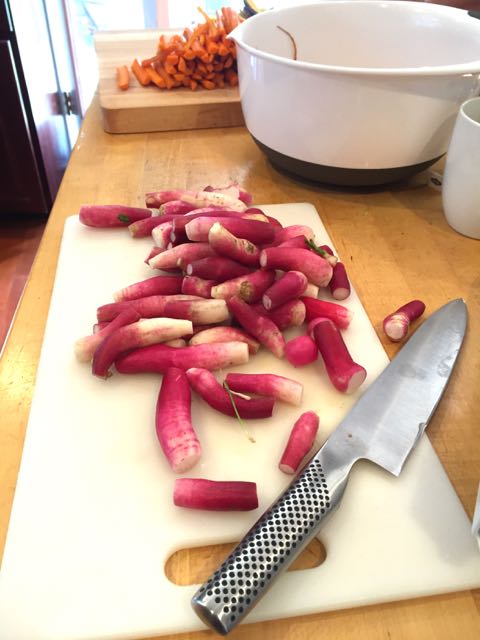
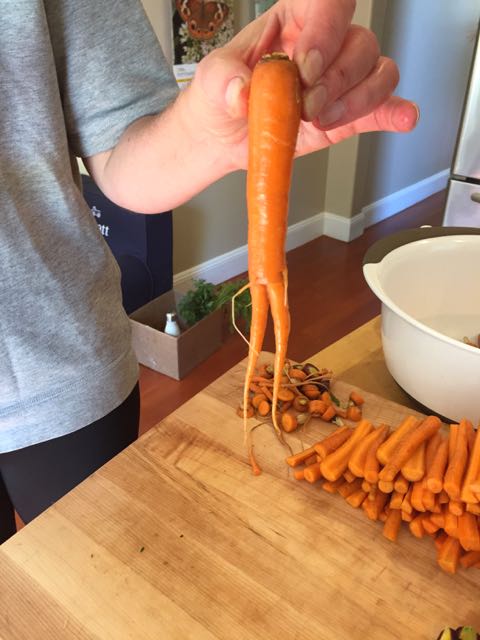

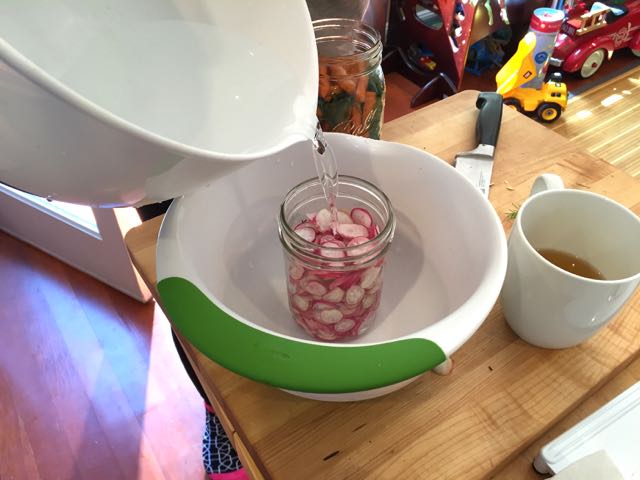
We washed and trimmed the vegetables, and then cut them into the shapes we wanted. Maja is a designer and you can tell just by how she cut and stacked the carrots. We mixed a 5% brine, and then we arranged our vegetables in the jars. Maja's were particularly artful. We added the brine to the jars, put a weight on top, and screwed the lids on loosely.
I advised Maja to taste the radishes and carrots every day after the first few days to start to notice how the flavors change over time. I told her that for me, around ten days, the salty flavor that has been so prevalent on the vegetables goes away and other flavors start to come through. That's when I call them "done," take off the weight, tighten the lids, and store the jars in the refrigerator for eating.
Recipes:
My recipe for dill carrots is the same as for dill beans, which appears in this post. Just substitute carrots and you've got it (today we omitted the chiles de árbol, but you could include them if you like your carrots spicy).
Fermented Dill Carrots
Ingredients:
- Enough carrots to fill your jars. Trim and cut into spears or rounds, whatever you like. You don't need to peel them.
- 1 bunch (or more) of fresh dill. (I've used as much as one bunch per quart jar, but have also used less.)
- 1-2 tablespoons of black peppercorns per jar
- About 1/4 teaspoon of celery seed per jar
- 1-3 peeled garlic cloves per jar (I like more garlic, but you may prefer less)
- Enough salt and water to make a 5% brine for your jars
- Fermentation weights, one for each jar. I love Sandy Der's weights.
Directions:
Wash the carrots and the dill. Put the dill fronds into the jars along with the peppercorns, celery seed, and garlic cloves. Fit the carrot pieces in the jars, as many as you can, in as organized a fashion as you can. Leave about two inches of space between the top of the carrots and the top of the jar. You may need to cut some of the carrots.
Measure 1 liter of water (about 4 1/4 cups) and 50 grams of salt (if you don't have a kitchen scale, for the Real Salt I used, 50 grams amounted to approximately 3 tablespoons of salt) and dissolve the salt in the water. When the salt is dissolved, pour the water into the jar of carrots until the carrots are fully submerged under the brine. Leave about an inch of space between the brine and the top of the jar. (If that wasn't enough brine for your jars, make another batch.) Place a fermentation weight on the top of the carrots in each jar so that the carrots stay under the brine. LOOSELY screw the lid on the jar. Write the date you started the carrots on the jar--grease pencil on the lid or a label made from masking tape work well--and put the jar in a cool corner, out of direct sunlight, to ferment. Check and taste every few days to see how the ferment is progressing and to confirm the carrots remain fully under the brine. Top off the jar with more water if the level drops. Our carrots are usually ready to enjoy in 10 days or so, but that timeframe can shift depending on the time of year and how warm it is in the house.
Fermented Radishes
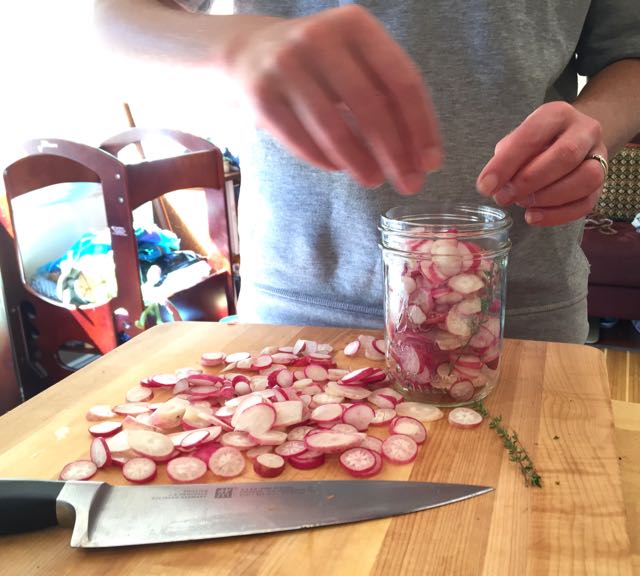
For radishes, the process is the same as for carrots but with fewer ingredients. All you need is radishes, salt, water, and a sprig of thyme (if you want to add one). Get as many radishes as you need to fill your jars. Wash, trim and cut your radishes. Cut the radishes however you like. I enjoy thin cross-sections, but you could easily do quarters or even whole radishes. Put the radishes in the jar by themselves or with a sprig of thyme. Pour in 5% brine, top the radishes with a weight (and if some radishes float up to the surface, lay a blanket of a washed cabbage leaf under the weight to keep all the radish slices under the brine). Cover the jar with a loose lid, and label the jar with the date you started them. Place the jar out of direct sunlight in a cool area, and check them every few days to see how they're tasting and to confirm they remain fully under the brine. The radishes should be ready to eat in about 7-10 days.